A flaky and delicious treat!
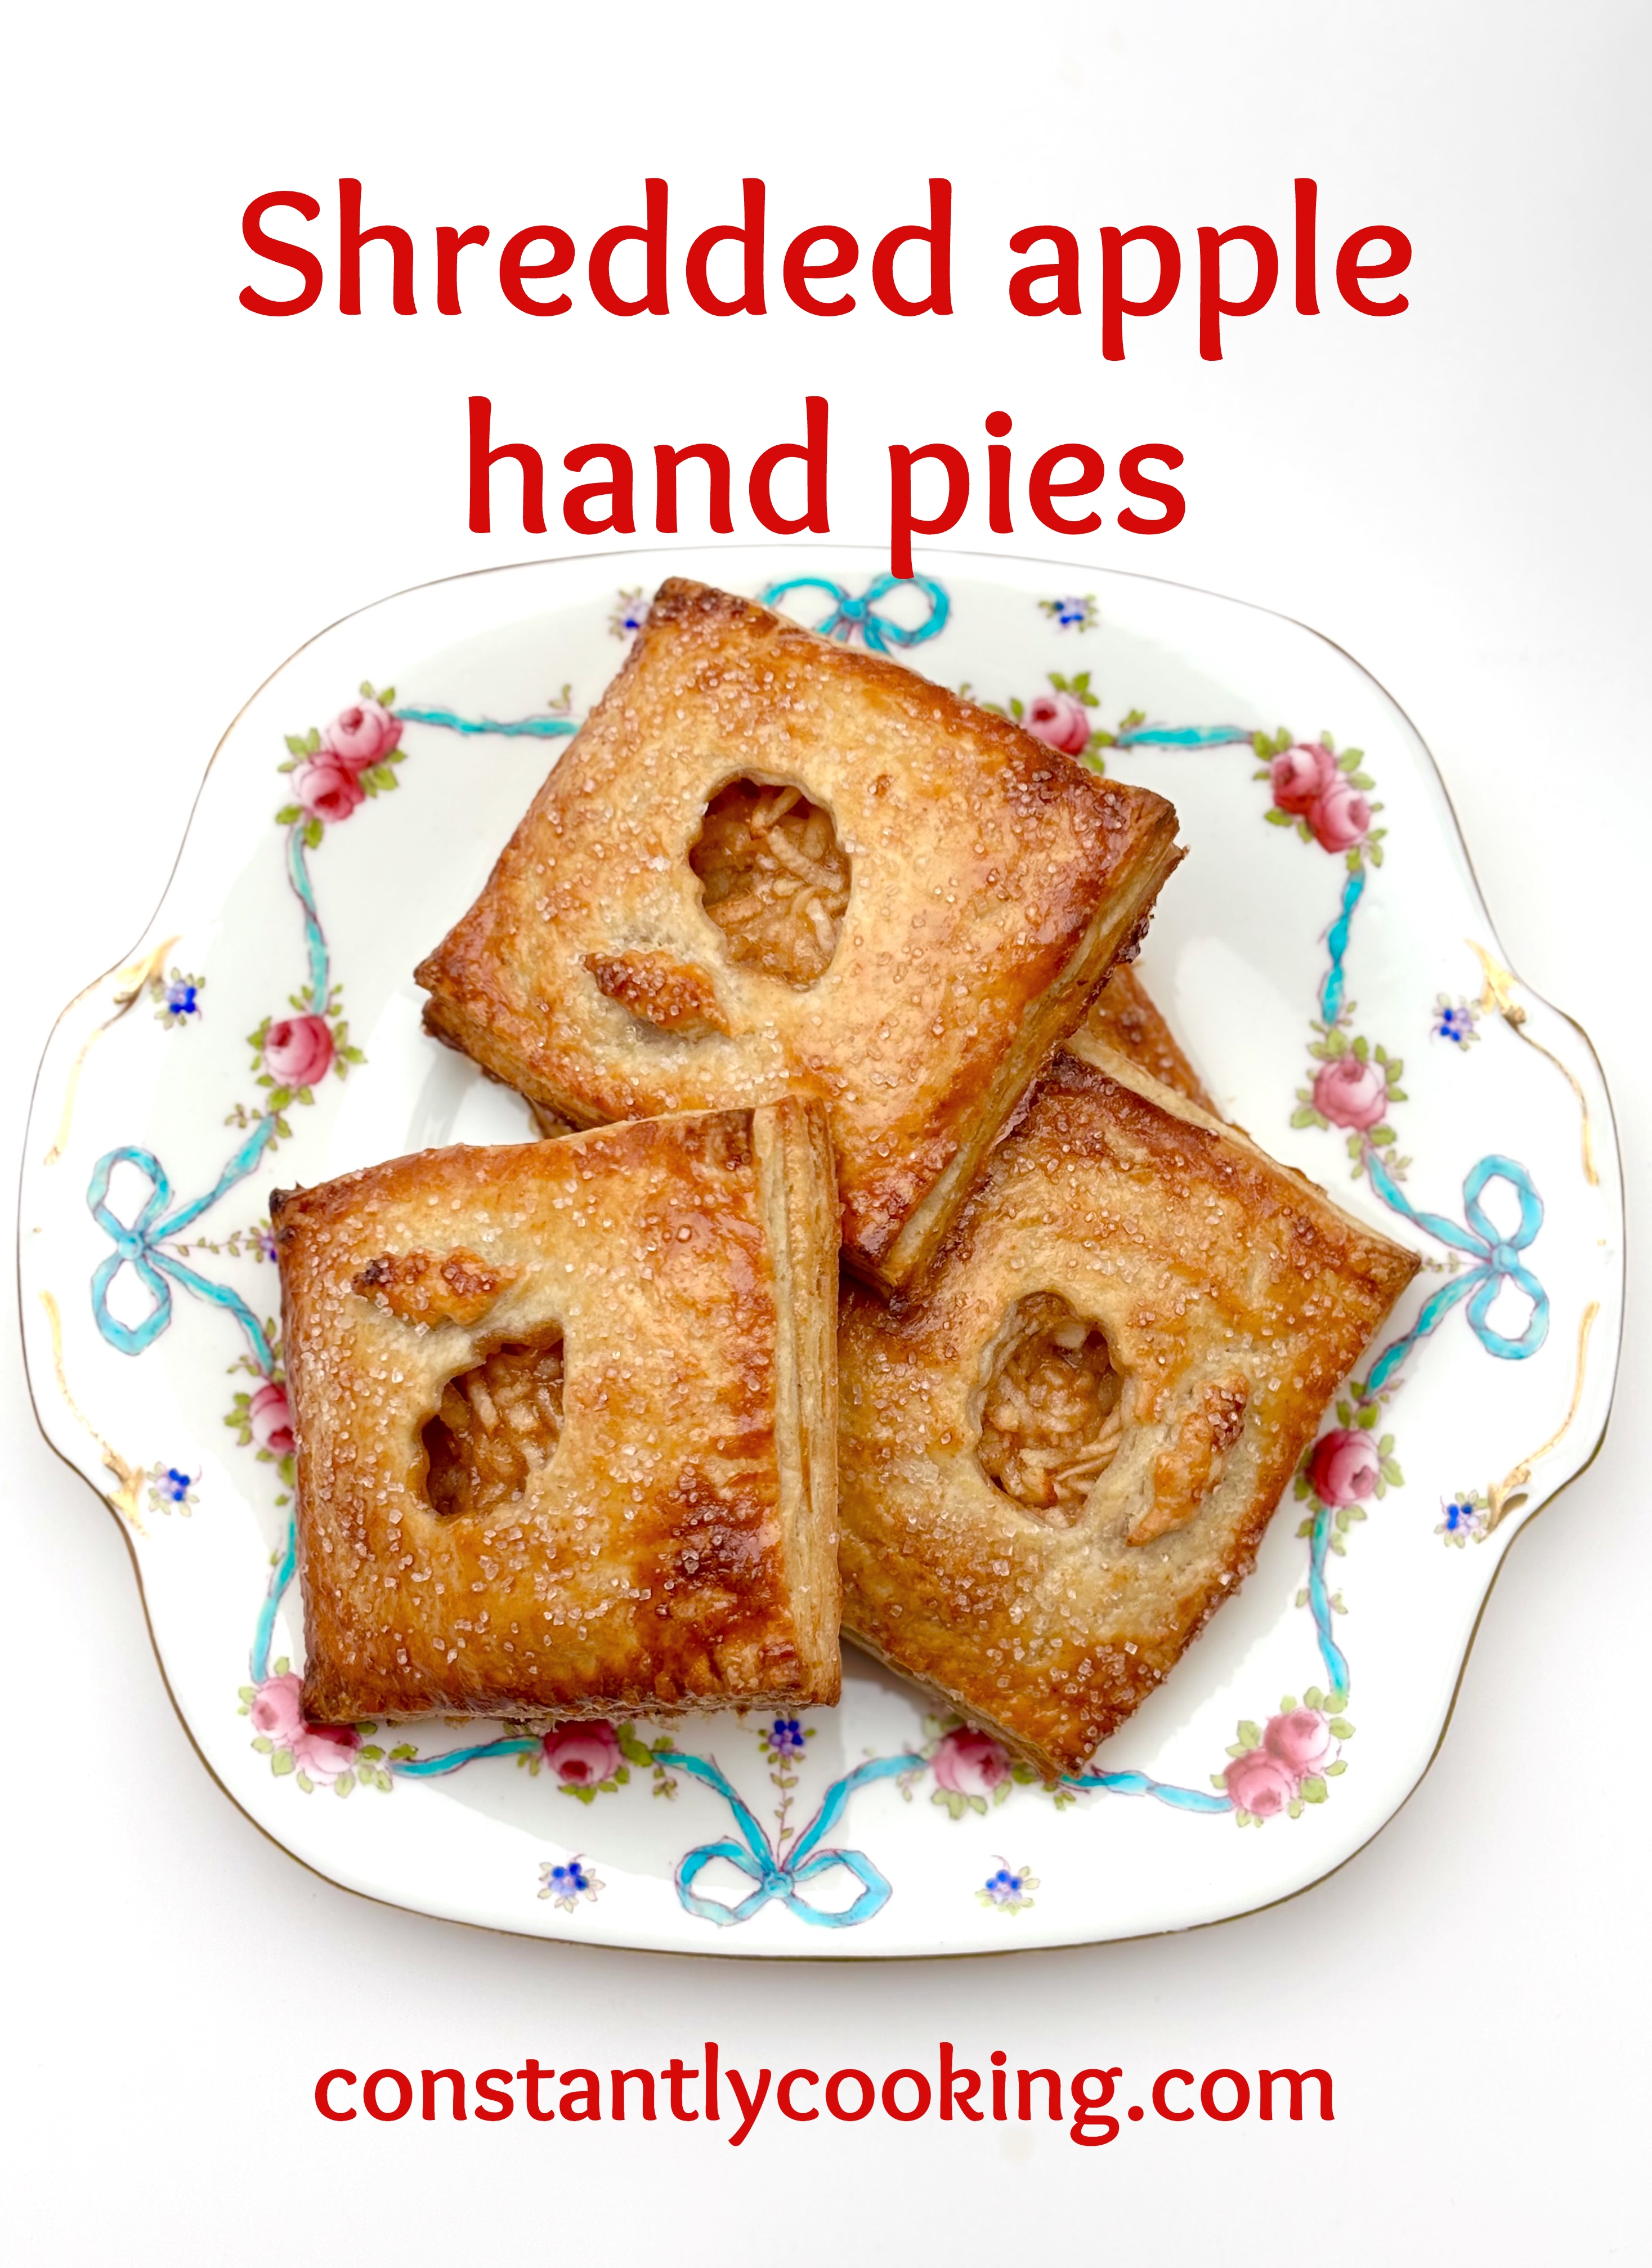
I recently learned that in some vintage pie recipes, apples are grated instead of sliced. The advantage of using shredded fruit is that the apple filling cooks quickly without becoming soggy; in addition the apples don’t shrink as much inside the crust, so the pies end up looking nice and full. For the pastry, using a bit of rye flour is another old trick; it gives the crust a delectable flavour and contributes to a more tender texture. If you prefer, you can use whole wheat instead of rye flour or simply 1 1/3 cups (162 g) unbleached all-purpose flour. As for vinegar, I recommend anything you like/have on hand except for white vinegar or balsamic. I recently used a maple vinegar that was outstanding; cider would be my second choice.

Ingredients
Pastry
- 1/4 cup (60 ml) hot water
- 1 tablespoon (15g) dark brown sugar
- 1 1/2 teaspoons vinegar
- 3/4 teaspoon salt
- 1 cup plus 3 tablespoons (142 g) unbleached all-purpose flour
- 3 tablespoons (20 g) rye flour
- 1/2 cup (112 g) very cold butter, in 1/2-inch (1.25 cm) cubes
- 1 egg, beaten (for assembling hand pies)
Filling
- 2 large apples, peeled, halved and cored *
- 1 teaspoon freshly squeezed lemon juice
- 1/4 cup (50 g) sugar
- 2 teaspoons cornstarch
- 1/2 teaspoon cinnamon
- Pinch salt
- 1 tablespoon (14 g) butter
- 1/4 teaspoon vanilla extract
*I used a Cortland and a Granny Smith
Method
- To make the pastry, combine the hot water, sugar and vinegar in a small glass jar. Cover and shake until the sugar dissolves then place the jar in the freezer to chill until very cold but not frozen (at least 15 minutes).
- You can prepare the pastry in the traditional way, using a pastry cutter and a mixing bowl, but I prefer to use a stand mixer fitted with the paddle attachment.
- Stir the flour and salt together in bowl and scatter the small butter cubes across the top. Mix on low speed for about 40-50 seconds until the ingredients have blended and formed a shaggy mixture.
- Still running the mixer at low speed, very slowly drizzle in the chilled water, sugar and vinegar mixture; continue to run the stand mixer just until the dough has almost come together in a rough ball (this should happen in less than a minute).
- Working quickly, turn the dough out onto a counter and use floured hands to press together into one large disc; pressing it down to a thickness of about 3/4 inch (2 cm). Wrap the disc tightly in plastic or beeswax wrap and let rest in the refrigerator for at least two hours before using. (You can also freeze the dough for later use; thaw in fridge before using).
- To make the apple filling, shred the apples using the coarse side of a box grater; place the prepared apples in a medium saucepan and sprinkle with lemon juice; stir to blend. Stir together the sugar, cornstarch, cinnamon and salt; sprinkle the mixture over the apples and stir again. Add the butter and place pan over medium heat, stirring occasionally as the butter melts. When butter has melted, reduce heat to medium-low and continue cooking, stirring often, until apples have softened are coated with a thickened, glossy sauce (about 7-9 minutes). Remove from heat and stir in vanilla. Transfer cooked apple mixture to a bowl and refrigerate until cooled. To speed things up, you can place the bowl in the freezer but keep an eye on it so it doesn’t freeze.
- Filling can be made up to a day in advance; cover and refrigerate until needed.
- When ready to shape the dough, lightly flour a sheet of parchment paper; place the disc of dough on top and wiggle it around to coat with flour. Sprinkle a bit more flour on top then place a second sheet of parchment on top.
- Roll the dough out to a rectangle slightly larger than 16 x 12 inches (40 x 30 cm), adding a bit more flour as needed to keep it from sticking to the parchment.
- With a sharp knife and using a ruler or tape measure, trim the edges of the rolled pastry to make a rectangle that is 16 x 12 inches (40 x 30 cm) then cut that rectangle into twelve equal pieces, each 4 inches (10 cm) square.
- Separate the squares so they are about an inch (2.5 cm) apart on the parchment.
- Place about two tablespoons of the chilled apple filling on six of the pastry squares. Brush beaten egg along the outer edge of the squares that have filling on them.
- Use a knife or decorative mini cookie cutter to cut a shape or slashes in the centre of the six remaining squares of pastry. Place them on top of the filled squares then use the tines of a fork to press the edges together to seal the hand pies.
- Carefully transfer the hand pies to a baking sheet lined with a fresh piece of parchment paper.
- At this point the pies can be chilled or frozen (transfer to an airtight container once frozen).
- When ready to bake, preheat oven to 425F. Brush the tops of the hand pies with the remaining beaten egg and sprinkle with white sanding sugar if you wish to add a pretty (and crunchy) touch.
- Bake the hand pies 17-20 minutes, until pastry is golden brown and filling is bubbling up through slits in top. Let cool 10 minutes before serving. (If baking from frozen, add 3-5 minutes to baking time).
Makes six hand pies; recipe can easily be multiplied.

One thought